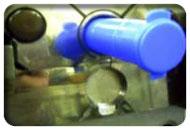
The mold consists of two sides, the cavity and the core. The container can be closed in the mold because the cavity that forms the lid is located in a movable piece of the mold called the flipper. Plastic is injected into the mold from the bottom of the body cavity and forms around the cores. The hinge of the container provides the pathway for the plastic to flow from the body to the lid cavity. As depicted, the container remains in the cavity after the cores have retracted. This differs from many injection molding processes where the part is usually removed from the cavity by the retracting core.
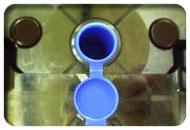
With the core side retracted, the flipper is free to rotate upwards. Step 2 illustrates the flipper moving the lid towards the body of the container. The flipper rotates 180º until the lid is closed. Since the container is still hot, the plastic flexes and allows the seal to form without distortion.
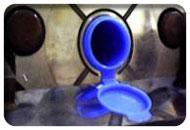
As the flipper returns to its home position, the lid is secured to the body of the container and the normal shrinkage process continues. Along with the airtight seals, shrinkage creates the “living hinge” of the container. The hinge is molded in the open position and as a result acquires memory for this orientation. The hinge also obtains memory in the closed position. This “dual memory” creates a robust “living hinge” which maintains its integrity indefinitely.
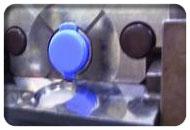
Once the flipper is fully retracted, the container is ejected from the mold with the use of a mechanical pin and air pressure. The container continues to cool until it reaches ambient temperature, providing a hermetic seal.